How to configure Microsoft System Center Operations Manager (SCOM) 2012 R2 as SNMP trap receiver for VMware vCenter on MS Windows?
One of the most interesting and very often asked things is how do I configure SCOM 2012 as a SNMP trap receiver? The solution isn't really
easy and a lot of SNMP basics are needed.
Again Microsoft need to do some homework to make some things much more easier and improve SCOM regarding SNMP traps. But first I would
like to thank some people for their good documentation which pushed me to the right direction:
I've done some investigations of our System Center Operations Manager 2012 R2 update rollup 2 installation and here are my findings:
- If your SNMP trap sending device isn't able to act as an typical SNMP agent, means that there can be an SNMP daemon running, you
never ever get this device discovered by SCOM! That's the fact!
- You should force a discovery for a specific SNMP version. If the device is discovered as version 2(c) device, SCOM ignores every trap from this
device if it is not a version 2 trap!
To get more familiar with the SCOM SNMP network device discovery I build following scenario:
Provisioning of a RedHat Enterprise Linux 5 VM and installation of the net-snmp suite. This software package delivered a full featured
SNMP daemon (snmpd) and additionally a snmptrap daemon (snmptrapd). All daemons (aka services) are highly configurable and there is very
good documentation.
- Enable discovering as SNMP v1 device
To act as a SNMP version 1 device is easy to configure. Just comment the v2c line.
[root@<hostname> ~]# vi /etc/snmp/snmpd.conf
...
#       groupName      securityModel securityName
group   notConfigGroup v1           notConfigUser
#group   notConfigGroup v2c           notConfigUser

####
# Third, create a view for us to let the group have rights to:
...
- Running the SNMP daemon
We use the typical service call:
[root@<hostname> ~]# service snmpd restart
Stopping snmpd:                                            [FAILED]
Starting snmpd:                                            [  OK  ]
[root@<hostname> ~]#
If this is all done, don't forget to save and configure SCOM to detect the new network device. Don't discover it as a Linux or Unix computer!
Before performing the discovery I started a port scan with nmap and found that only port 161 is opened on the SCOM 2012 installation. This is
the reason why SCOM 2012 isn't able to act as a SNMP trap receiver out of the box unless the device discovery is successful done!
[root@<hostname> ~]# nmap -sU -p U:161 <FQDN-SCOM>

Starting Nmap 4.11 ( http://www.insecure.org/nmap/ ) at 2014-06-20 12:28 CEST
Interesting ports on <FQDN-SCOM> (<SCOM-IP>):
PORT    STATE         SERVICE
161/udp open|filtered snmp
MAC Address: 00:50:56:A3:xx:yy (VMWare)

Nmap finished: 1 IP address (1 host up) scanned in 0.325 seconds
[root@<hostname> ~]#
[root@<hostname> ~]# nmap -sU -p U:162 <FQDN-SCOM>

Starting Nmap 4.11 ( http://www.insecure.org/nmap/ ) at 2014-06-20 12:28 CEST
Interesting ports on <FQDN-SCOM> (<SCOM-IP>):
PORT    STATE  SERVICE
162/udp closed snmptrap
MAC Address: 00:50:56:A3:xx:yy (VMWare)

Nmap finished: 1 IP address (1 host up) scanned in 0.118 seconds
[root@<hostname> ~]#
But now let us configure the MS Windows Server 2012 and the SCOM 2012 R2 update rollup 2 in several separate steps.
- First we have to do some prerequisites on the Windows operating system
-
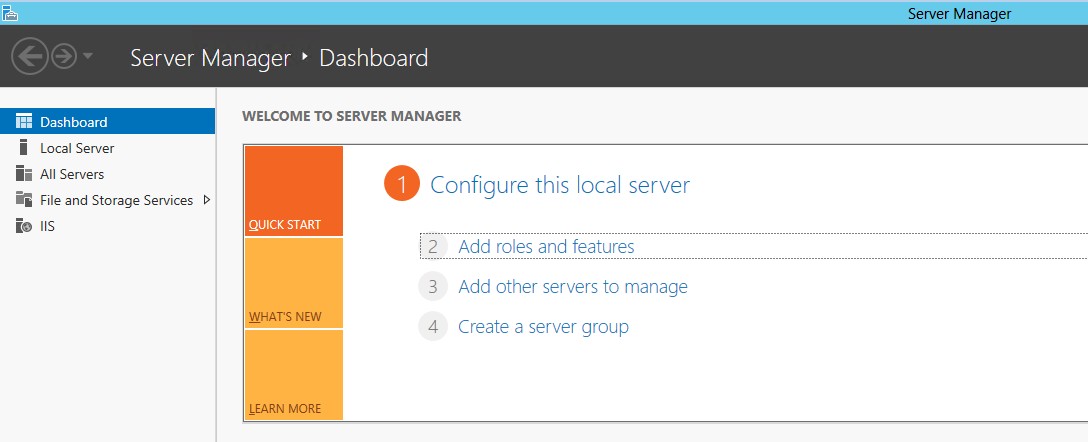
Click on Server Manager -> Dashboard -> Add roles and features
-
Read and click next

-
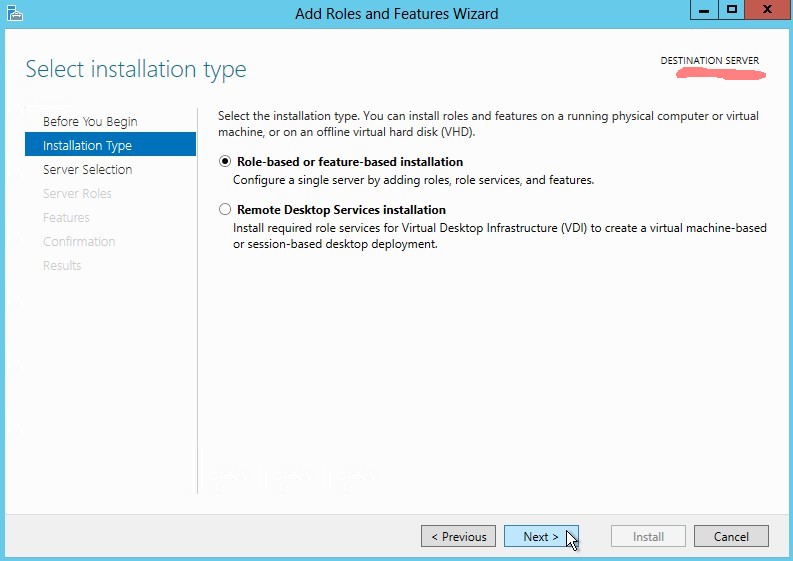
Select role-based of feature-based installation
-
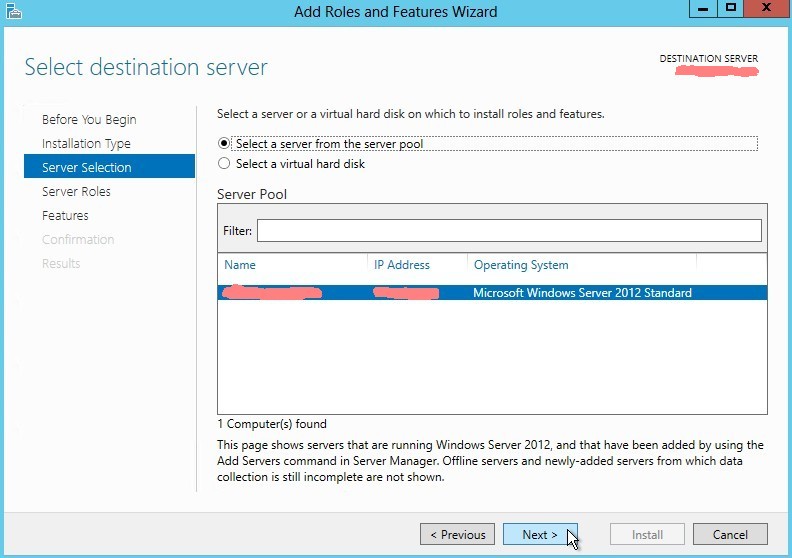
Select a server from the server pool
-
Just click next
-
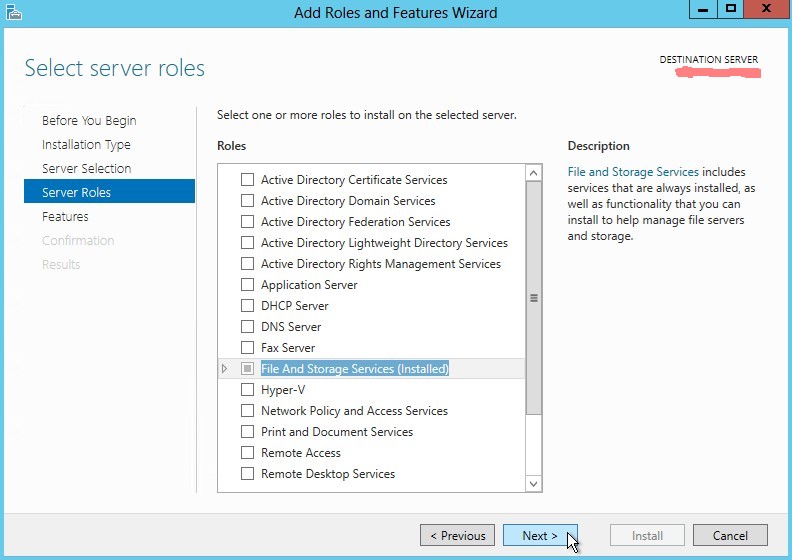
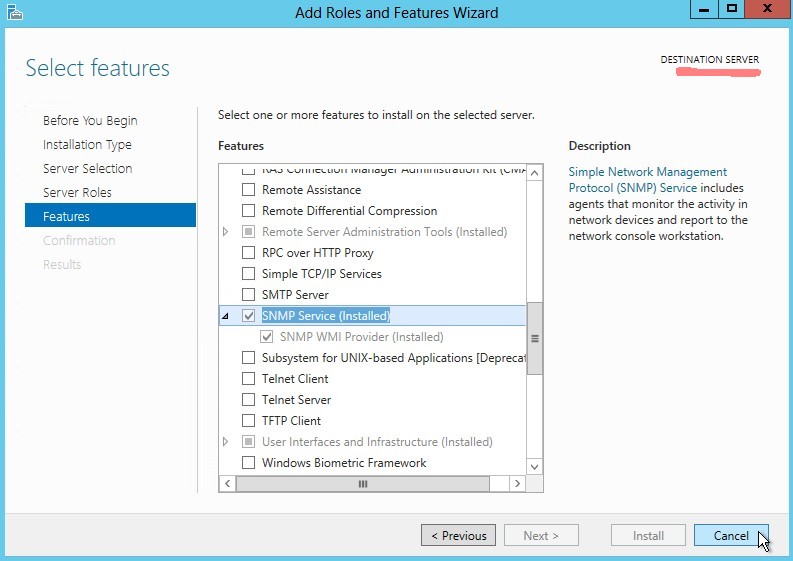
Check SNMP service (should be installed)
-
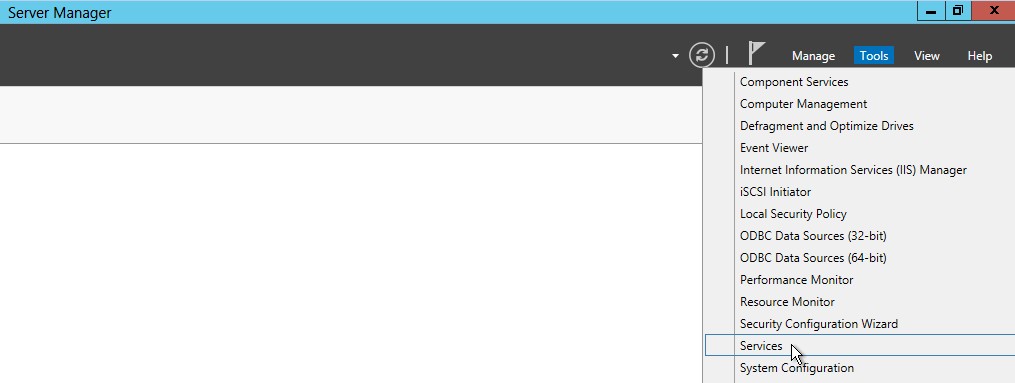
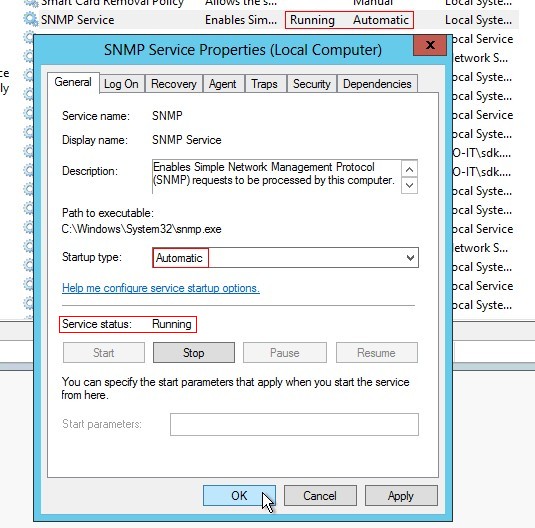
Click on Server Manager -> Tools -> Services
-
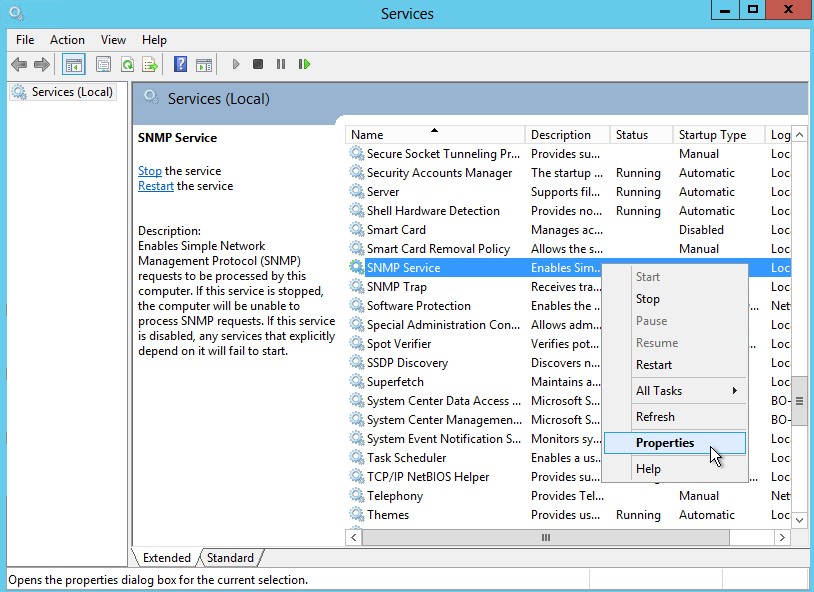
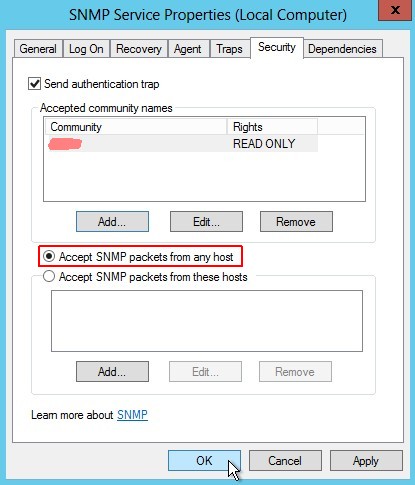
Click on SNMP Service -> Properties
-
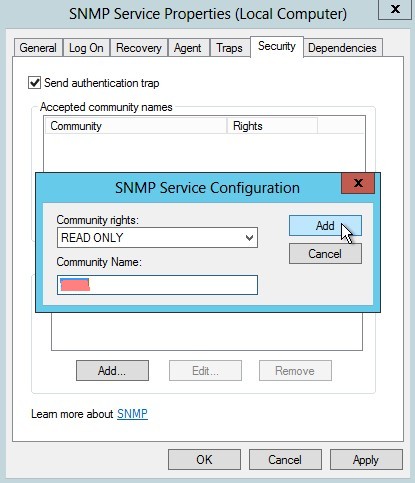
Set SNMP community
-
Select accept SNMP packets from any host
-
SNMP Service startup type has to be automatic and Service status has to be running
-
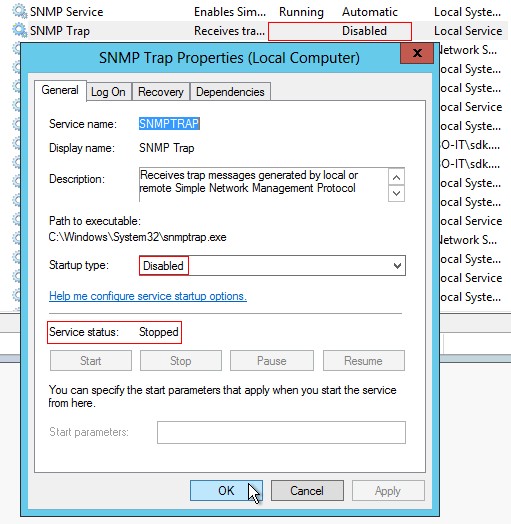
SNMP Trap startup type has to be disabled and Service status has to be stopped
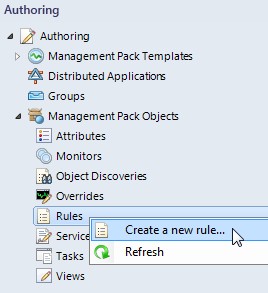
- Second we have to create a Management Pack rule in SCOM
-
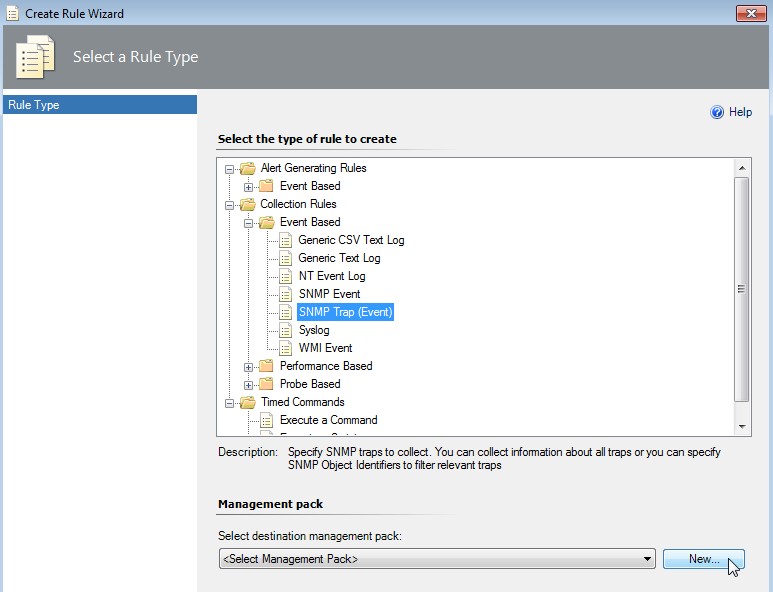
Click on Authoring -> Management Pack Objects -> Rules -> Create a new rule...
-
Select SNMP Trap (Event) rule type and click on New... near Management pack
-
Create the Management pack
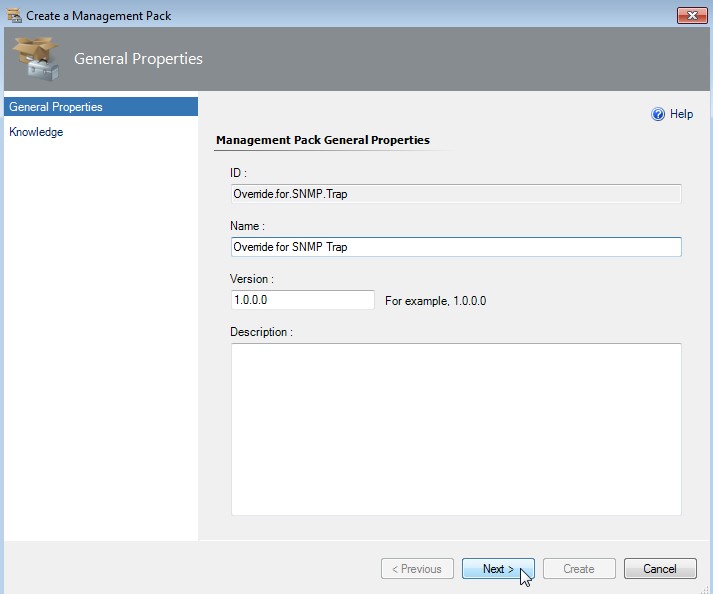
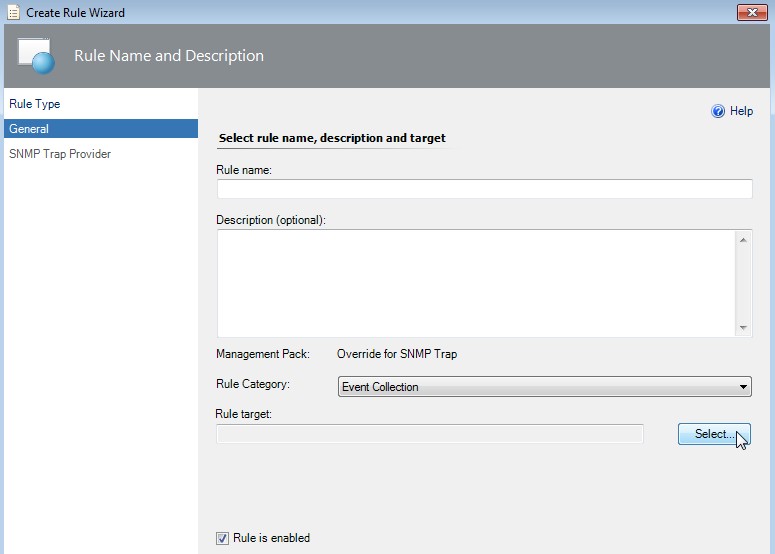
Enter a useful name like "Override for SNMP Trap". Click on Next.
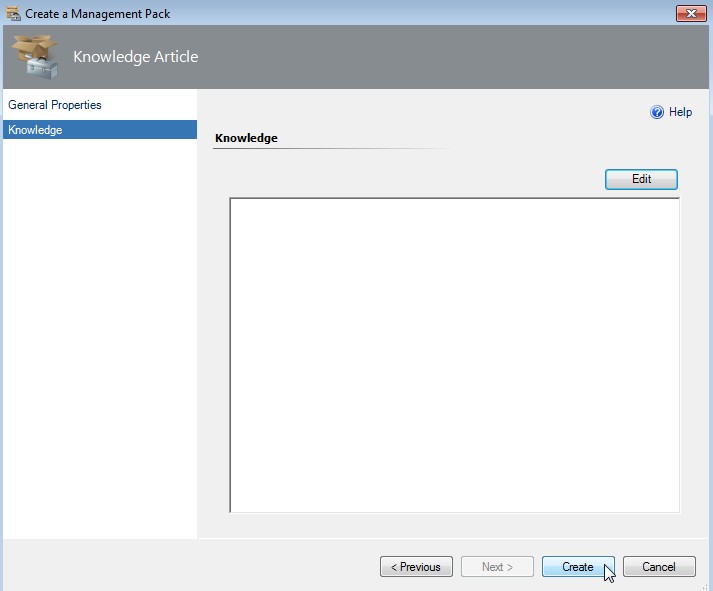
-
Enter some knowledge (or not) and click on Create
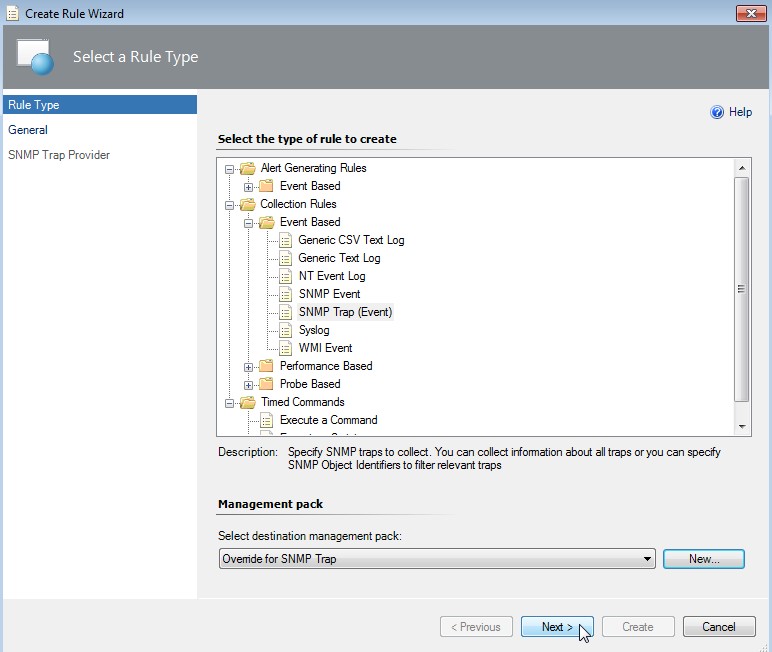
-
Back on rule type selection click on Next
-
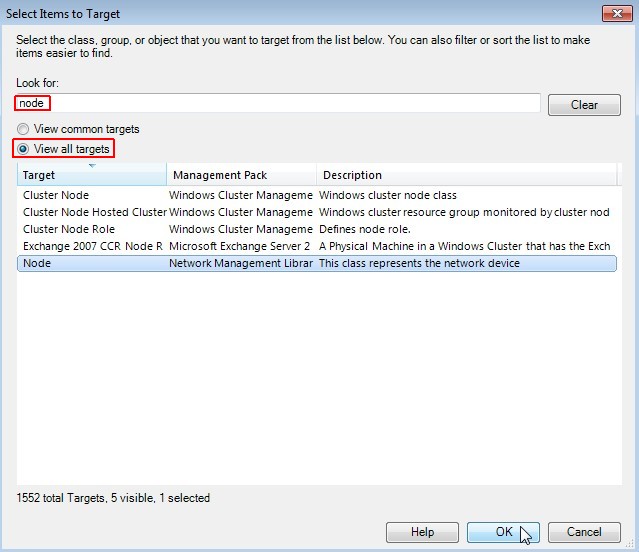
Select a rule target first
-
Select Node as target
-
Select rule name
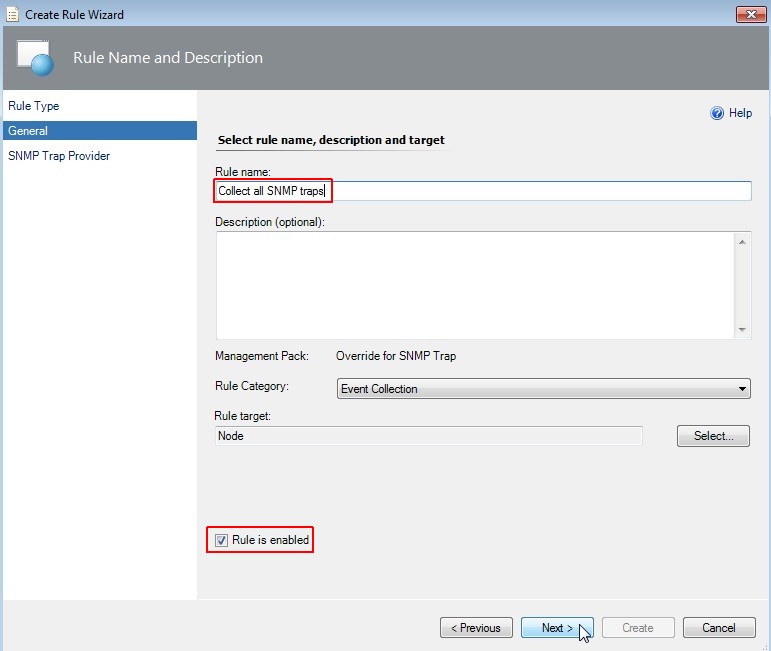
Enter a useful rule name like "Collect all SNMP traps". Check if rule is enabled and click on Next.
-
Configure the trap OIDs to collect
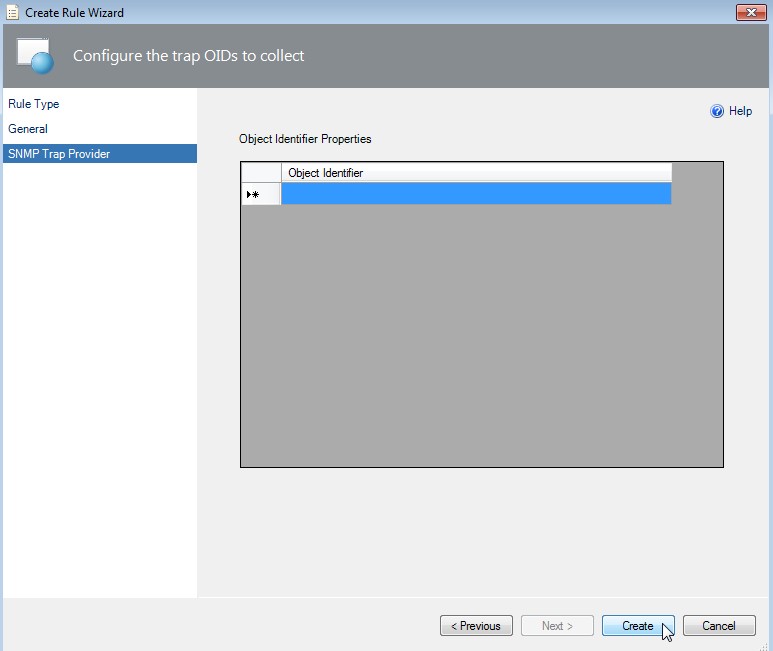
In SCOM 2012 R2 update rollup 2 you can leave the Object Identifier field empty. Click on Create.
-
Enable the scope view
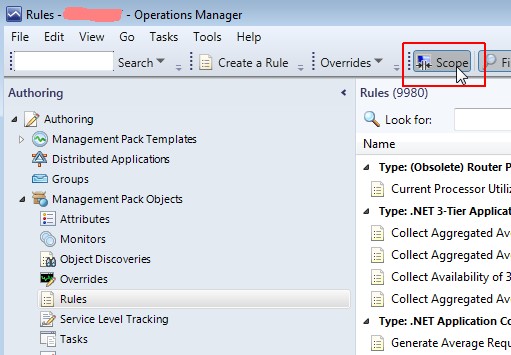
-
Select the target "Node"
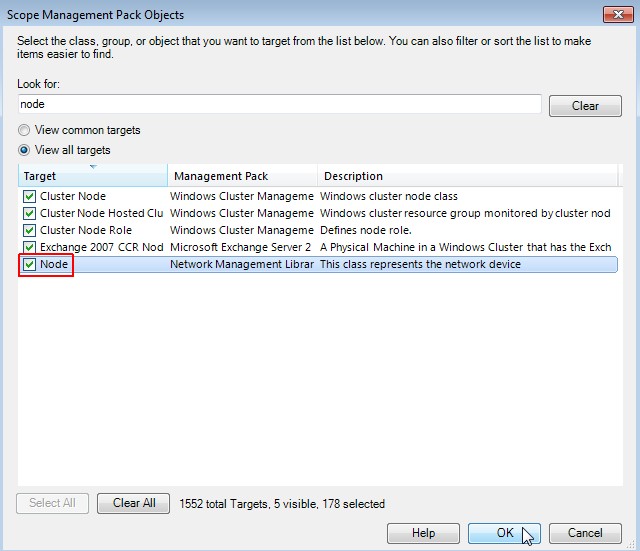
Enable the target "Node". Click on OK.
-
Review the settings of the created rule of type node
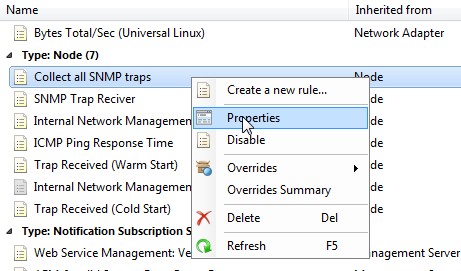
-
"Collect all SNMP traps" properties

Click on Edit... near "Data sources".
-
SNMP Trap Event trap provider properties
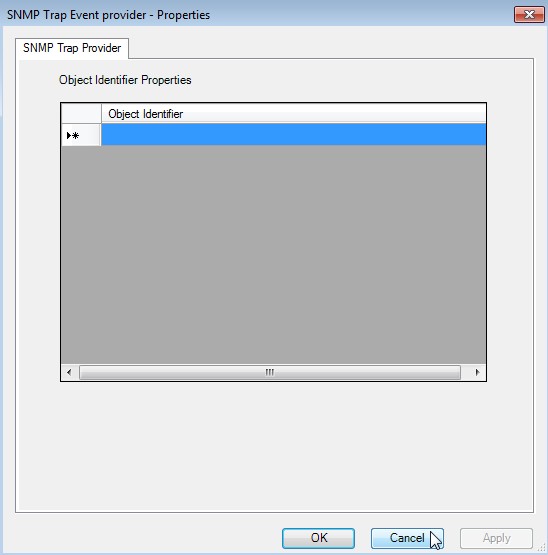
The Object Identifier Properties are empty. Click on Cancel.
- Third we have to create a trap monitor in SCOM
-
Click on Monitoring -> New -> Folder...
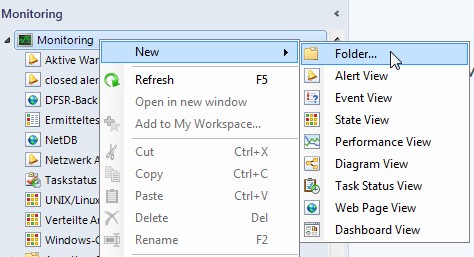
-
Review the settings of the created rule of type node

Enter a useful folder name like "SNMP Management" and select the formerly created MP "Override for SNMP Trap". Click on OK.
-
Create an Event View
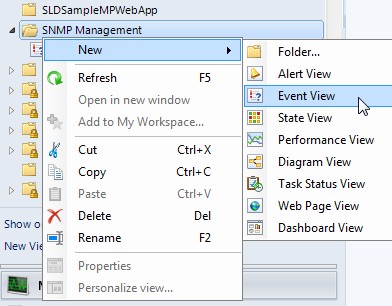
Click on SNMP Management -> New -> Event View
-
Edit the properties of the Event View
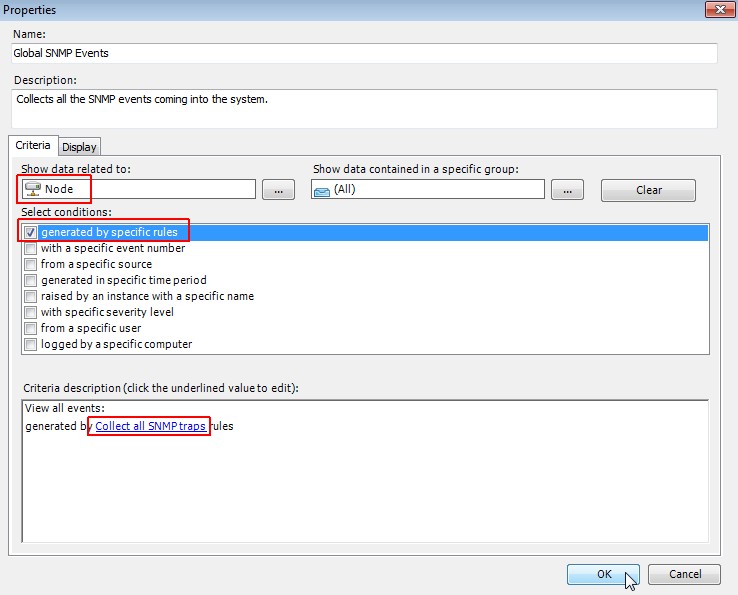
In tab "Criteria" choose "Node", select "generated by specific rules" and choose the "Collect all SNMP traps" rule. Click on OK.
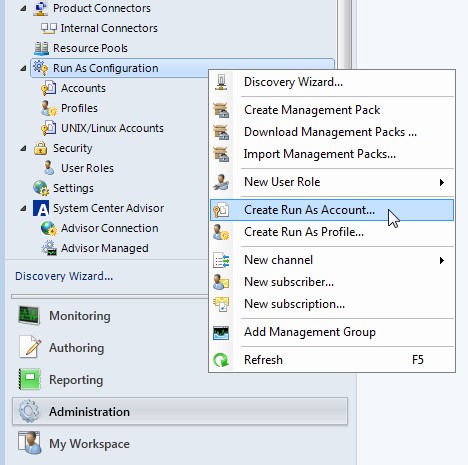
- Fourth we have to create a Run As Account
-
Click on Administration -> Run As Configuration -> Create Run As Account...
-
Specify general account properties
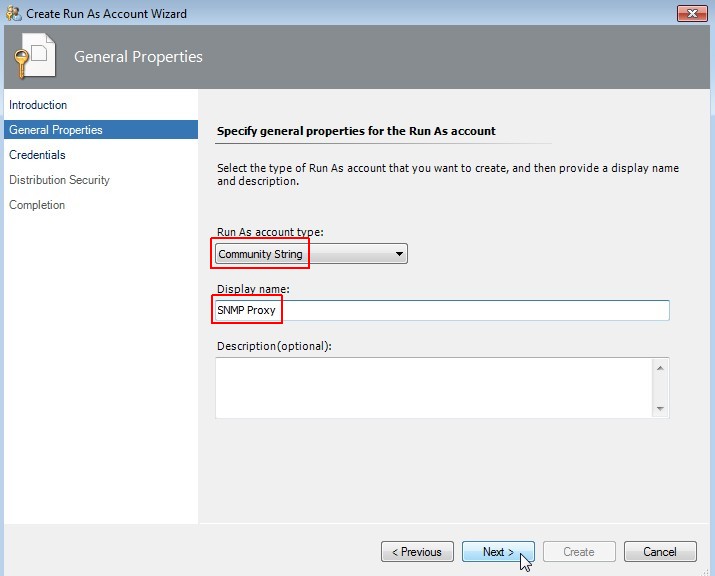
Choose "Community String" as account type and enter a useful display name like "SNMP Proxy". Click on Next.
-
Set credentials
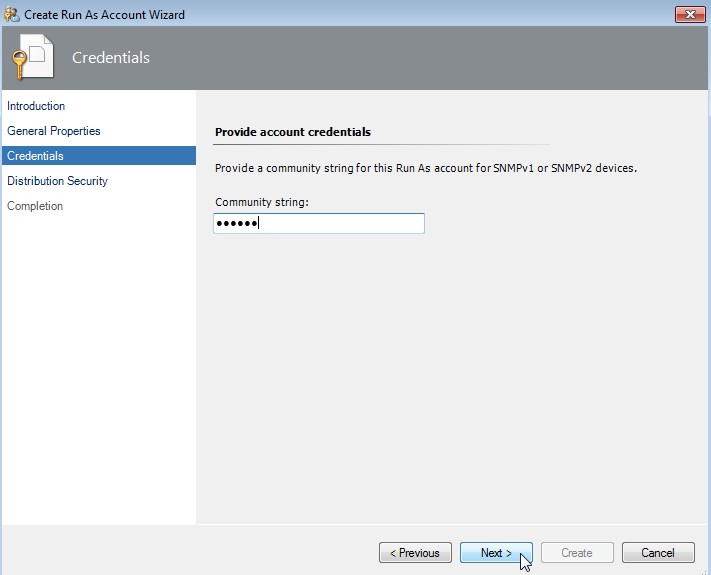
Enter the community string and click on Next.
-
Select a distribution security option
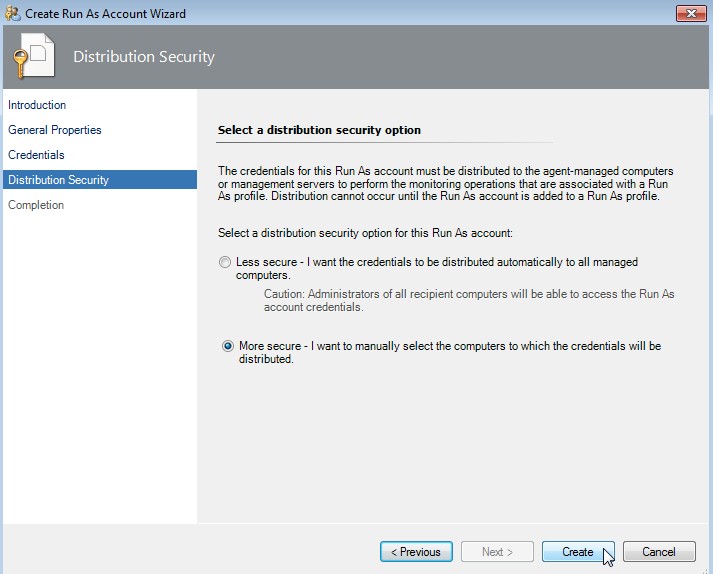
Choose "More secure" and click on Create.
-
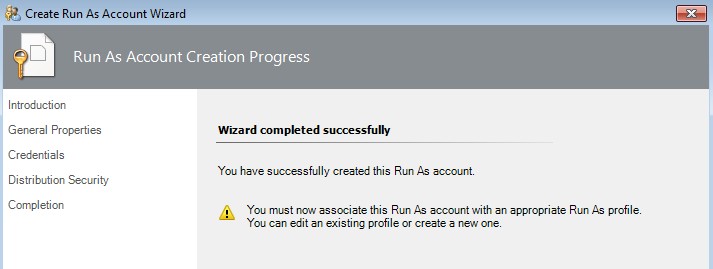
Prompt to create a profile
- Fifth we have to create a Run As Profile
-
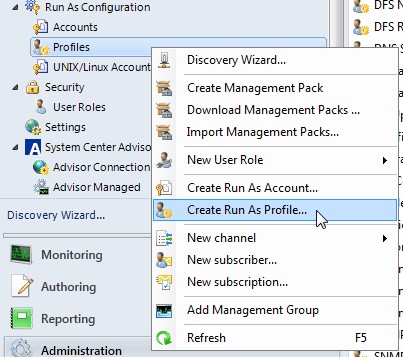
Click on Administration -> Run As Configuration -> Profiles -> Create Run As Profile...
-
Specify general profile properties
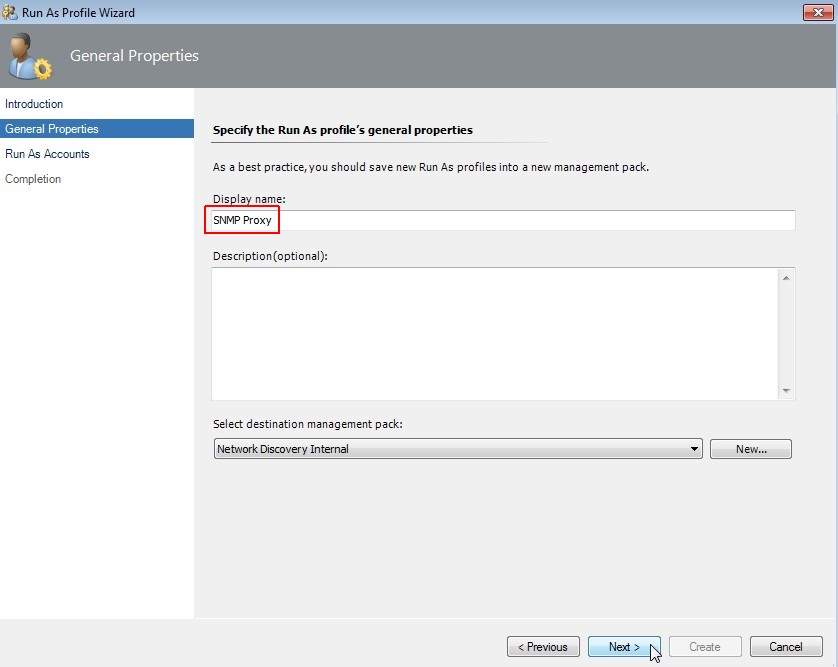
Enter the same display name "SNMP Proxy" like we used for the "Run As Account". Click on Next.
-
Add Run As Account
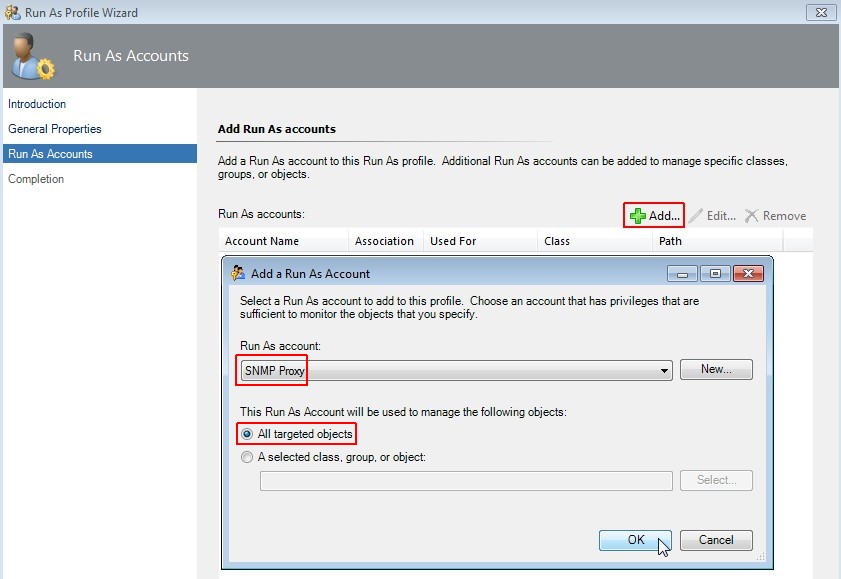
Select "Add", choose "SNMP Proxy" and select "All targeted objects". Click on OK.
-
Create profile
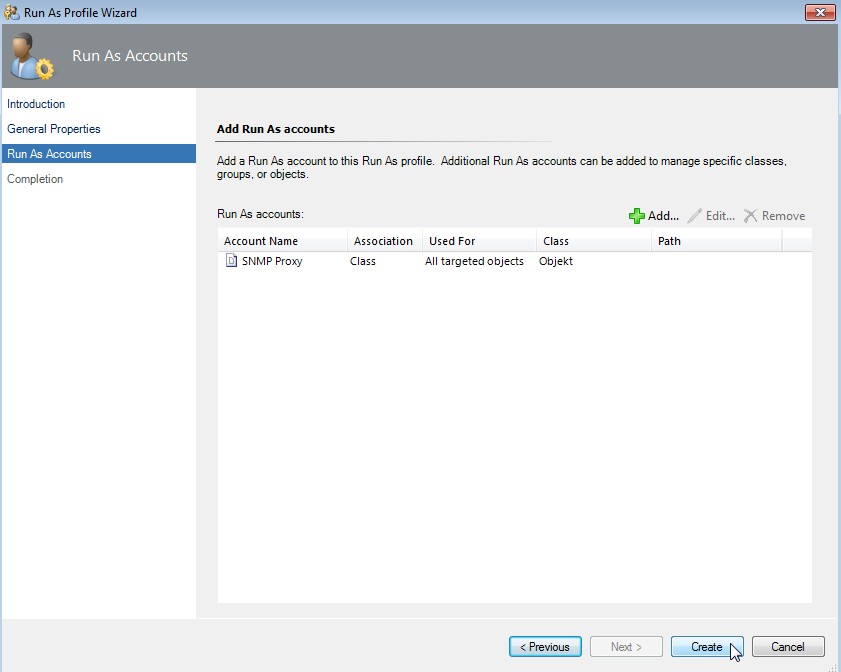
Click on Create.
-
Warning about account distribution
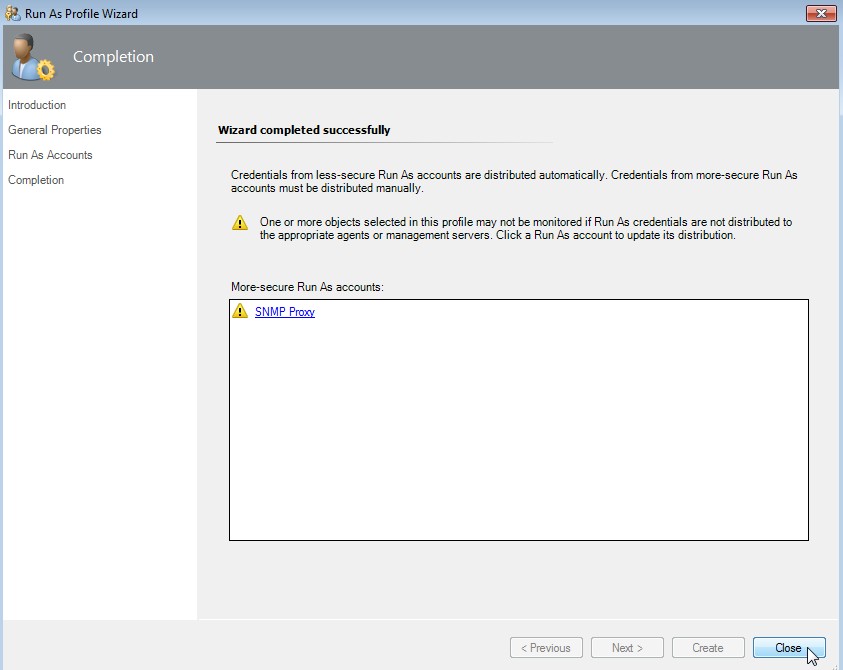
First click on "SNMP Proxy" (green hook appeares) and then click on Close.
Start of the network device discovery
-
Click on Administration -> Network Management -> Discovery Wizard...
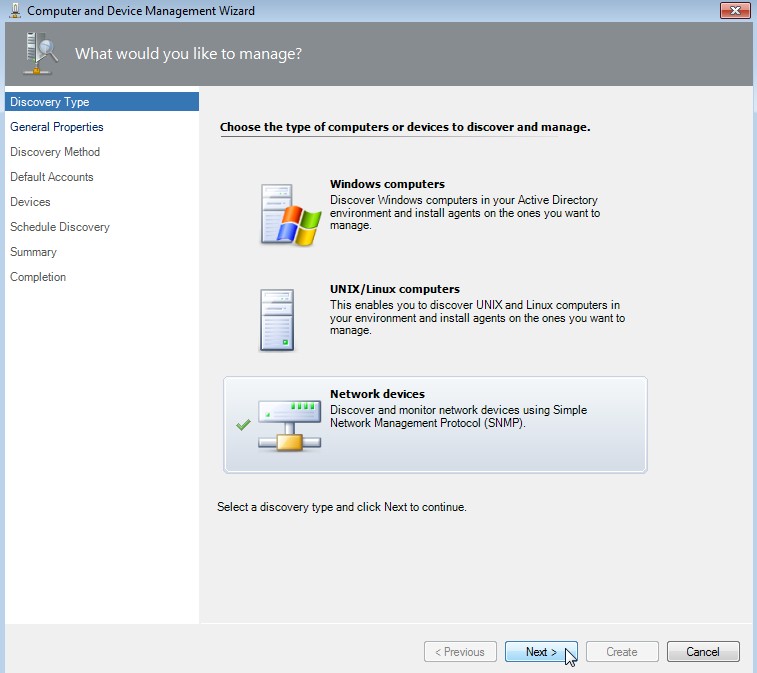
Select "Network devices" and click on Next.
-
Select a management or gateway server
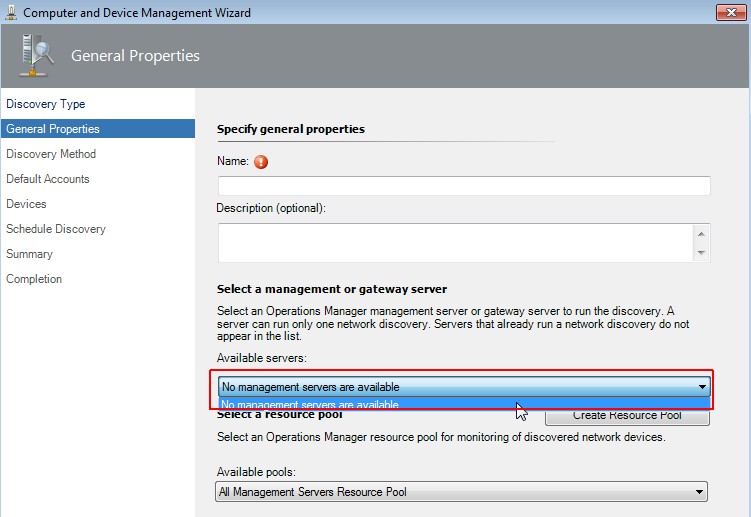
If there is just the message that no management servers are available, please check the discovery rules!
-
Check discovery rules
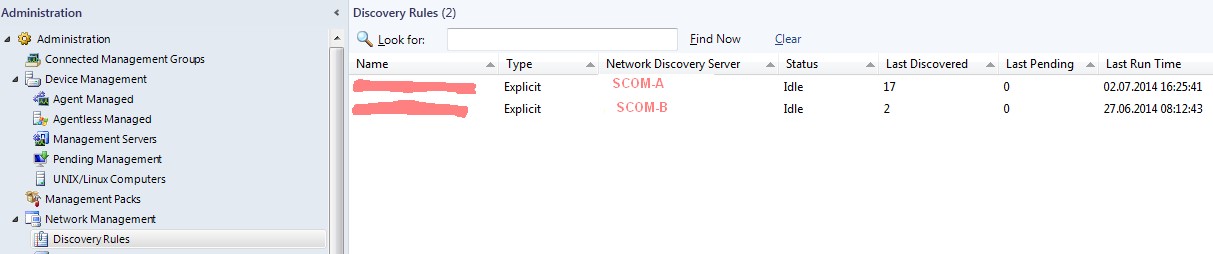
Go to Administration -> Network Management -> Discovery Rules. If there are all your SCOM servers listet, it is not allowed to
configure any further discovery rule. You have to delete at least one rule to go further! Again I can't understand this behavior. Why
isn't it possible to define various rules and select one of them for a specific discovery? Once more a lack of functionality into SCOM.
-
Set general properties
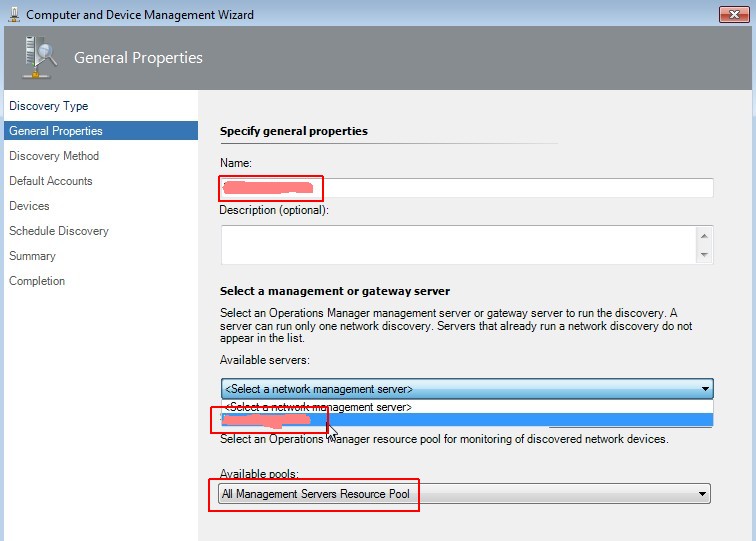
Enter the name (FQDN) of your network device, select a management server and pool. Click on Next.
-
Set general properties
Enter the name (FQDN) of your network device, select a management server and pool. Click on Next.
-
Select a discovery type
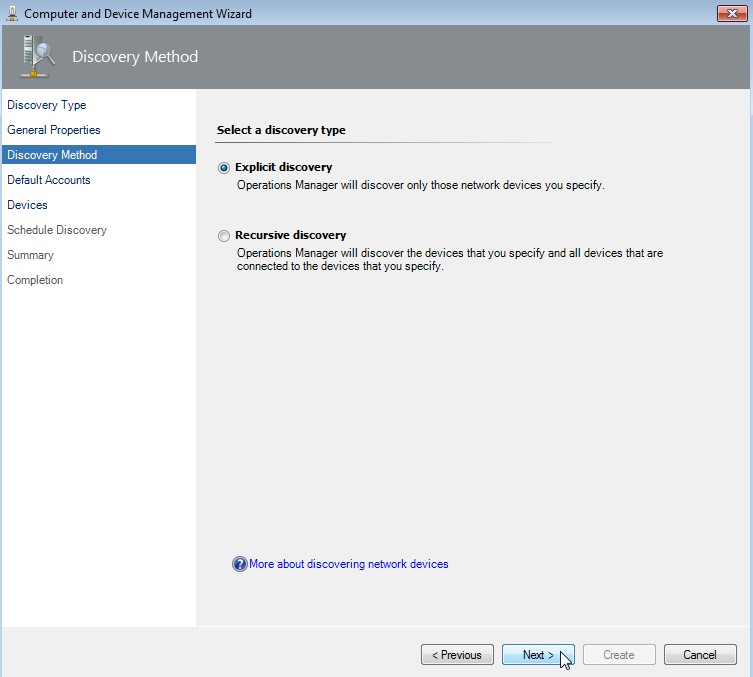
Select "Explicit discovery" and click on Next.
-
Specify the default Run As accounts for discovery
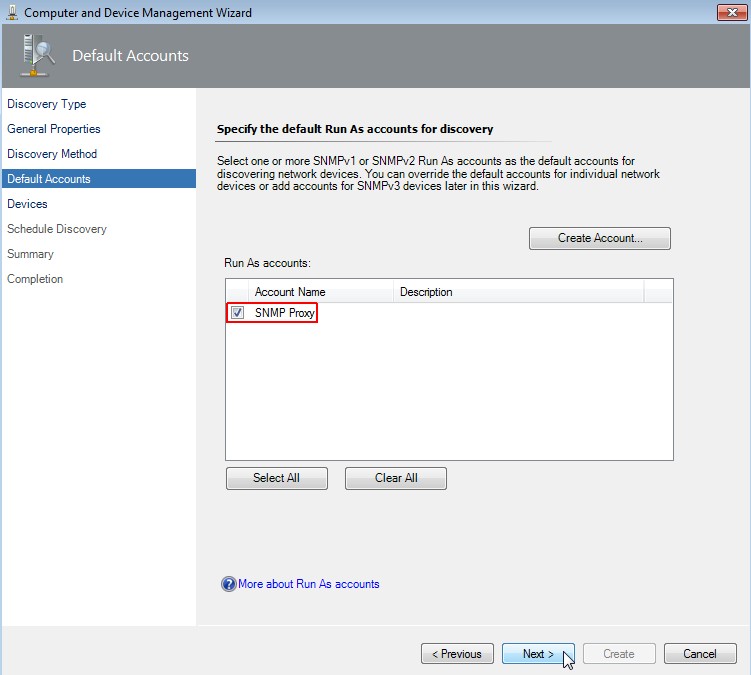
Select "SNMP Proxy" as account name and click on Next.
-
Specify devices
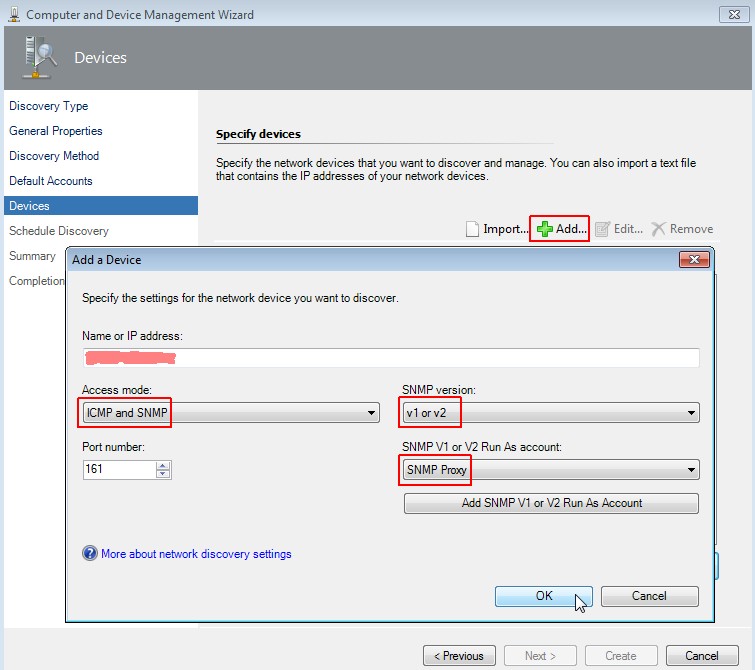
Click on "Add", enter name or IP of the device, choose "ICMP and SNMP" as access mode, select "v1 or v2" as snmp version
and "SNMP Proxy" as account. Click on OK and then on Next.
-
Schedule the network discovery
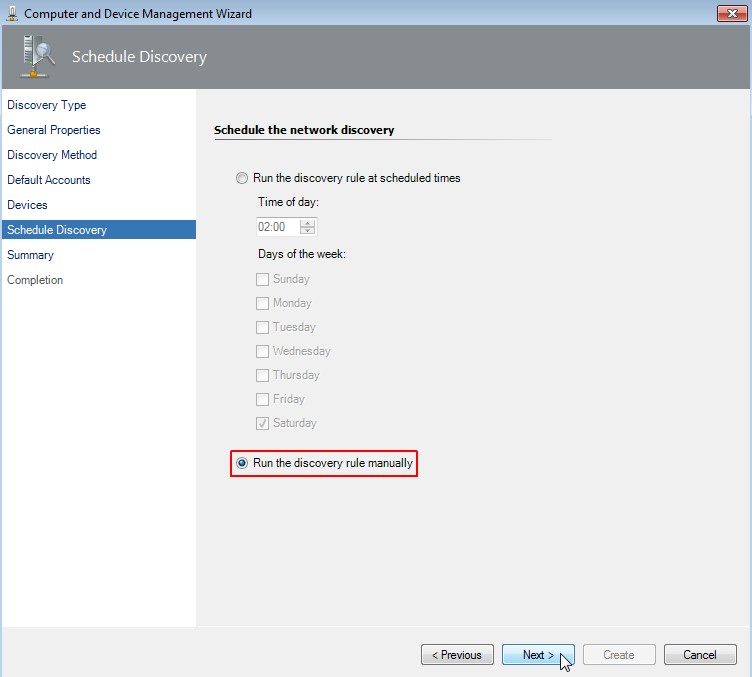
Choose "Run the discovery rule manually". Click on Next.
-
Confirm the settings
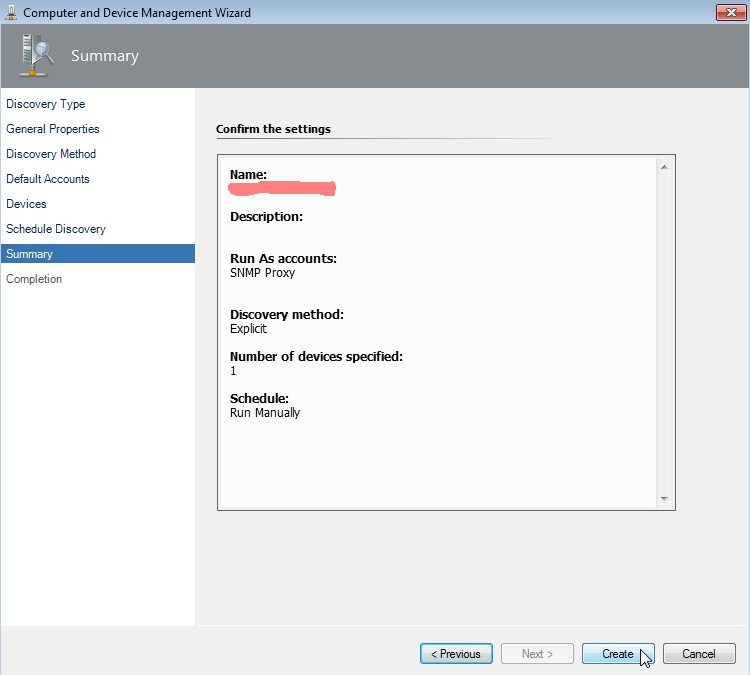
Click on Create.
-
Wait for completion
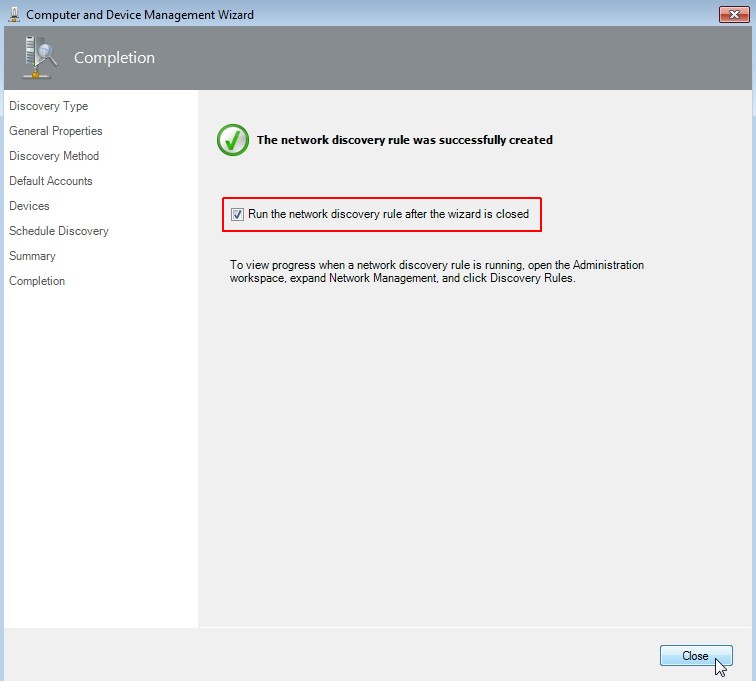
Select "Run the network discovery rule after the wizard is closed". Click on Close.
And voila there is a new network SNMP version 1 device discovered on port 161!
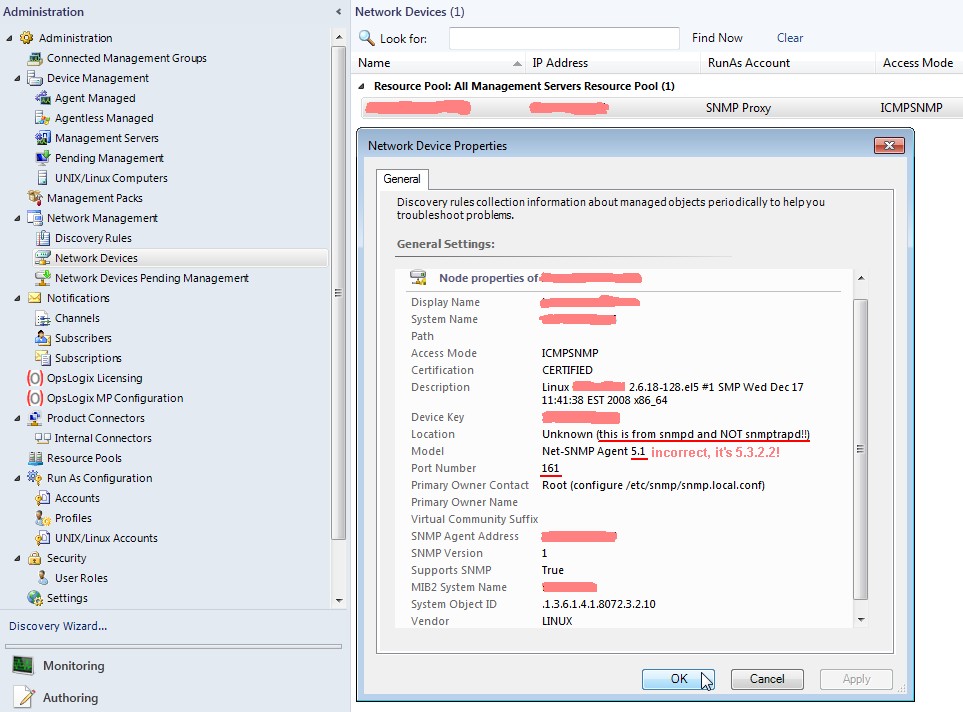
The information showed are mainly the content of snmpd.conf of the Linux server and not from snmptrapd.conf!
Furthermore the net-snmp agent version seems to be hardcoded in SCOM, because the version displayed is older than the
installed version.
A nmap scan again shows that port 162 is now listening on the SCOM 2012 system.
[root@<hostname> ~]# nmap -sU -p U:162 <FQDN-SCOM>

Starting Nmap 4.11 ( http://www.insecure.org/nmap/ ) at 2014-06-20 13:31 CEST
Interesting ports on <FQDN-SCOM> (<SCOM-IP>):
PORT    STATE         SERVICE
162/udp open|filtered snmptrap
MAC Address: 00:50:56:A3:xx:yy (VMWare)

Nmap finished: 1 IP address (1 host up) scanned in 0.321 seconds
[root@<hostname> ~]#
Now it's time to disable (stop) the SNMP daemon on the Linux server and try to send some SNMP traps. There is a
command line utility which can be used for sending SNMP traps. Don't confound things, this is not snmptrapd!
[root@<hostname> ~]# service snmpd stop
Stopping snmpd:                                            [  OK  ]
[root@<hostname> ~]#
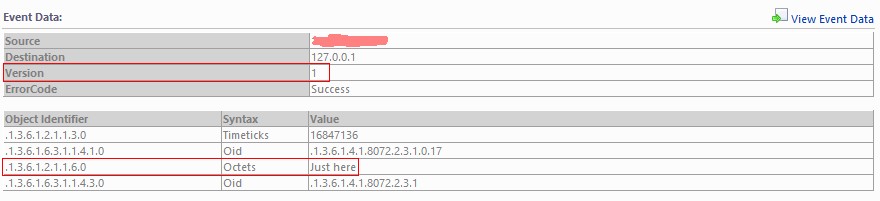
[root@<hostname> ~]# snmptrap -v 1 -c public <FQDN-SCOM> .1.3.6.1.4.1.8072.2.3.1 "" 6 17 "" .1.3.6.1.2.1.1.6.0 s "Just there"
[root@<hostname> ~]#
or
[root@<hostname> ~]# snmptrap -v 1 -c public <FQDN-SCOM> NET-SNMP-EXAMPLES-MIB::netSnmpExampleNotification "" 6 17 "" SNMPv2-MIB::sysLocation.0 s "Just here"
[root@<hostname> ~]#
shows following result in SCOM. Please note that SCOM doesn't translate the OIDs to the appropriate entity names by itself!
For the interested reader now a small collection of SNMP v2c and v1 traps and how SCOM detected them.
-
Trap version 2(c) SNMP trap
Use of snmptrap cli:
[root@<hostname> ~]# snmptrap -v 2c -c public <FQDN-SCOM> 0 NET-SNMP-EXAMPLES-MIB::netSnmpExampleHeartbeatNotification netSnmpExampleHeartbeatRate i 60
[root@<hostname> ~]#
or
[root@<hostname> ~]# snmptrap -v 2c -c public <FQDN-SCOM> 0 .1.3.6.1.4.1.8072.2.3.0.1 .1.3.6.1.4.1.8072.2.3.2.1.0 i 60
[root@<hostname> ~]#
Display into SCOM 2012:

-
Trap version 1 SNMP trap
Use of snmptrap cli:
[root@<hostname> ~]# snmptrap -v 1 -c public <FQDN-SCOM> NET-SNMP-EXAMPLES-MIB::netSnmpExampleNotifications "" 6 1 "" netSnmpExampleHeartbeatRate i 60
[root@<hostname> ~]#
or
[root@<hostname> ~]# snmptrap -v 1 -c public <FQDN-SCOM> .1.3.6.1.4.1.8072.2.3 "" 6 1 "" .1.3.6.1.4.1.8072.2.3.2.1.0 i 60
[root@<hostname> ~]#
Display into SCOM 2012:

Now we see a bunch on non-speaking object identifiers. There is a tool called snmptranslate into the net-snmp package which translates the OID into the entity name and vice versa:
| ObjectIdentifier |
snmptranslate -m ALL |
Syntax |
Value |
snmptranslate -m ALL |
| .1.3.6.1.2.1.1.3.0 |
DISMAN-EVENT-MIB::sysUpTimeInstance |
Timeticks |
26266607 |
- |
| .1.3.6.1.6.3.1.1.4.1.0 |
SNMPv2-MIB::snmpTrapOID.0 |
Oid |
.1.3.6.1.4.1.8072.2.3.0.1 |
NET-SNMP-EXAMPLES-MIB::netSnmpExampleHeartbeatNotification |
| .1.3.6.1.4.1.8072.2.3.2.1 |
NET-SNMP-EXAMPLES-MIB::netSnmpExampleHeartbeatRate |
Integer |
60 |
- |
| .1.3.6.1.6.3.1.1.4.3.0 |
SNMPv2-MIB::snmpTrapEnterprise.0 |
Oid |
.1.3.6.1.4.1.8072.2.3 |
NET-SNMP-EXAMPLES-MIB::netSnmpExampleNotifications |
If you use the option -m ALL snmptranslate will scan the MIB directory, RHEL default is /usr/share/snmp/mib, parse all MIBs and build the entity names out of the OIDs.
I've bundled the needed MIBs into a download file [vmware-mibs.tar.gz;82 kByte], which you can request here.
More information about the latest MIBs are available from VMware: http://kb.vmware.com/kb/1013445.
This was a short trip into the world of object identifiers and entity names. Let us now switch back to real world.
We are now able to discover a network device, which sends SNMP traps to SCOM 2012. But what about network devices which
are unable to answer SNMP requests but able to send SNMP traps? Is it possible to monitor them with System Center Operations Manager?
The answer is: yes, but not the smart way. First you have to deploy a server like the RedHat Enterprise Linux I've
mentioned above and configure it identical (hostname and ip address and SNMP version) to your network device. If this
Linux server was successful discovered by SCOM just remove it and substitute it with the "real" SNMP trap
sending network device. This should work pretty good! But beware the circumstance that SCOM 2012 just shows the object
identifier and is not able to import MIBs! This is a severe shortage.
I guess some guys know that the snmptrap daemon is able to forward SNMP traps. Now, maybe that it is possible to forward SNMP
traps from a MS Windows server, let's say VMware vCenter Server, using this RHEL server? Well I've extend my scenario to verify
this:
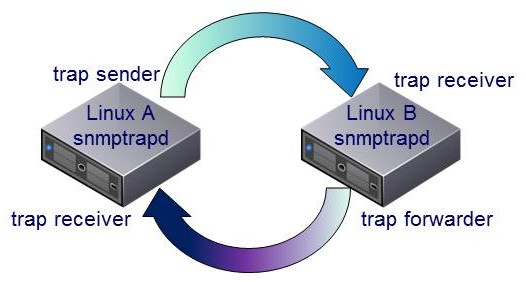
Linux A sends a snmptrap to Linux B. Linux B is configured as a forwarder for SNMP traps and sends the trap immediatly
back to Linux A which is a snmptrap receiver, too. I do this without including SCOM to verify that the setup is full functional.
We can monitor the behavior of the two systems by observing the content of /var/log/messages on both servers.
send trap from Linux A to Linux B:
[root@<hostnameA> ~]# snmptrap -v 1 -c public <hostnameB> .1.3.6.1 localhost 6 17 "" .1.3.6.1 s "Just a test"
[root@<hostnameA> ~]#
Logfile Linux B:
Jun 18 14:46:04 <hostnameB> snmptrapd[4215]: 2014-06-18 14:46:04 localhost.localdomain [127.0.0.1] (via UDP: [<hostnameA-IP>]:38153) TRAP, SNMP v1, community public SNMPv2-SMI::internet Enterprise Specific Trap (17) Uptime: 265 days, 5:59:58.77 SNMPv2-SMI::internet = STRING: "Just a test"
Logfile Linux A:
Jun 18 14:46:04 <hostnameA> snmptrapd[32387]: 2014-06-18 14:46:04 localhost.localdomain [127.0.0.1] (via UDP: [<hostnameB-IP>]:37360) TRAP, SNMP v1, community public SNMPv2-SMI::internet Enterprise Specific Trap (17) Uptime: 265 days, 5:59:58.77 SNMPv2-SMI::internet = STRING: "Just a test"
Hey, that looks good.
/var/log/messages from Logfile Linux A:
Jun 18 14:47:00 <hostnameA> snmptrapd[32387]: 2014-06-18 14:47:00 <vCenter-FQDN> [<vCenter-IP>] (via UDP: [<vCenter-IP>]:56912) TRAP, SNMP v1, community public VMWARE-PRODUCTS-MIB::vmwVC Enterprise Specific Trap (VMWARE-VC-EVENT-MIB::vpxdDiagnostic) Uptime: 34 days, 21:34:31.53
Isn't it cool? It will work pretty good from the Linux point of view. Let's transfer the scenario using SCOM 2012 as SNMP
trap receiver, which means that there is an additional trap receiver to configure:

As you might guess, the result is: nothing! I can't see any new trap into SCOM 2012 by using the last scenario, just the old ones sending direct from Linux B. Oh, what a mess!
These are the configuration changes on Linux B:
- /etc/snmp/snmptrapd.conf
authCommunity net,log public
forward default <hostnameA-IP> public
forward default <SCOM-IP> public
traphandle VMWARE-VC-EVENT-MIB::vpxdDiagnostic /root/scom/bin/traps vpxdiag
traphandle VMWARE-PRODUCTS-MIB::vmwVC          /root/scom/bin/traps vcenter
traphandle .1.3.6.1.4.1.6876.4.3               /root/scom/bin/traps vcenteroid
traphandle .1.3.6.1.4.1.6876.4.3.0.202         /root/scom/bin/traps vpxdiagoid

disableAuthorization yes
You see the forward rules, they are self-explaining. The next lines are trap handlers, I will tell a bit later about them. The
last line (disableAuthorization yes) is needed if you use net-snmp v5.3 or greater.
- Create the trap handler script /root/scom/bin/traps
The trap handlers are able to execute a script if a specific trap is received. Because the forwarding doesn't work, what about triggering
a new trap with the received values? Let's see what happens if we create the script.
#!/bin/bash

BASE='/usr/bin/snmptrap -v 1 -c public <SCOM-FQDN> .1.3.6.1.4.1.6876.4.3 "" 6'
VPXDIAG='202 ""'
VPXDALARMINFO='203 "" '
vars=

while read oid val
do
  OBJECT="$VPXDALARMINFO"
  if [ "$oid" = "<vCenter-FQDN>" ]
  then
    continue
  fi
  if [ "$oid" = "<UNKNOWN>" ]
  then
    continue
  fi
  if [ "$oid" = "UDP:" ]
  then
    continue
  fi
  if [ "$oid" = "SNMP-COMMUNITY-MIB::snmpTrapAddress.0" ]
  then
    continue
  fi
  if [ "$oid" = "SNMP-COMMUNITY-MIB::snmpTrapCommunity.0" ]
  then
    continue
  fi
  if [ "$oid" = "DISMAN-EVENT-MIB::sysUpTimeInstance" ]
  then
    continue
  fi
  if [ "$oid" = "SNMPv2-MIB::snmpTrapOID.0" ]
  then
    continue
  fi
  if [ "$oid" = "SNMPv2-MIB::snmpTrapEnterprise.0" ]
  then
    continue
  fi
  if [ "$oid" = "VMWARE-VC-EVENT-MIB::vmwVpxdTargetObjType.0" ]
  then
    if [ "$val" = "unknown" ] ; then
     val=1
    elif [ "$val" = "host" ] ; then
     val=2
    elif [ "$val" = "vm" ] ; then
     val=3
    elif [ "$val" = "other" ] ; then
     val=4
    fi
  fi
  if [ "$val" = "VMWARE-VC-EVENT-MIB::vpxdDiagnostic" ]
  then
    OBJECT="$VPXDIAG"
    break
  fi
  if [ "$vars" = "" ]
  then
    if [ "$oid" = "VMWARE-VC-EVENT-MIB::vmwVpxdTargetObjType.0" ]
    then
      vars="$oid i \"$val\""
    else
      vars="$oid s \"$val\""
    fi
  else
    if [ "$oid" = "VMWARE-VC-EVENT-MIB::vmwVpxdTargetObjType.0" ]
    then
      vars="$vars $oid i \"$val\""
    else
      vars="$vars $oid s \"$val\""
    fi
  fi
done

echo "trap: $1 # $BASE $OBJECT $vars" >> /root/scom/bin/snmptraphandle.txt
clean_vars=$(echo $vars | sed -e 's/Ä/Ae/g' -e 's/Ö/Oe/g' -e 's/Ü/Ue/g' -e 's/ä/ae/g' -e 's/ö/oe/g' -e 's/ü/ue/g' -e 's/ß/ss/g')
eval "$BASE" "$OBJECT" "$clean_vars"
- Changes of /etc/init.d/snmptrapd
...
. /etc/init.d/functions

OPTIONS="-m ALL -Ls 3 -p /var/run/snmptrapd.pid"
#OPTIONS="-Lsd -p /var/run/snmptrapd.pid"
if [ -e /etc/sysconfig/snmptrapd.options ]; then
...
- Restart of snmptrapd
[root@<hostnameA> ~]# service snmptrapd restart
Stopping snmptrapd:                                        [  OK  ]
Starting snmptrapd:                                        [  OK  ]
[root@<hostnameA> ~]#
- The vpxd diagnostic trap
To receive the vpxd diagnostic trap from vCenter every minute follow the kb article about how
to change the default sending period of the diagnostic SNMP trap on vCenter: http://kb.vmware.com/kb/2020271.
If you don't know how to send SNMP traps from vCenter there is a kb article, too:
http://kb.vmware.com/kb/1006438.

Yeah, we've got it! It works as expected. Now we can receive SNMP traps send by a vCenter Server running Microsoft Windows using
a Linux server as a kind of trap rewriter.
Now let me write some words about the configuration. You may have recognized in snmptrapd.conf the duplicate lines, e.g.
traphandle VMWARE-VC-EVENT-MIB::vpxdDiagnostic /root/scom/bin/traps vpxdiag
and
traphandle .1.3.6.1.4.1.6876.4.3.0.202 /root/scom/bin/traps vpxdiagoid
In your final configuration you could delete one of the lines. It doesn't matter if you use OIDs or entity names. In my opinion it's better to
use the entity names, because they are more "human readable" instead of the OIDs. Additionally you can delete the forward lines,
they are obsolete.
I was inspired from the handler script example from the net-snmp team
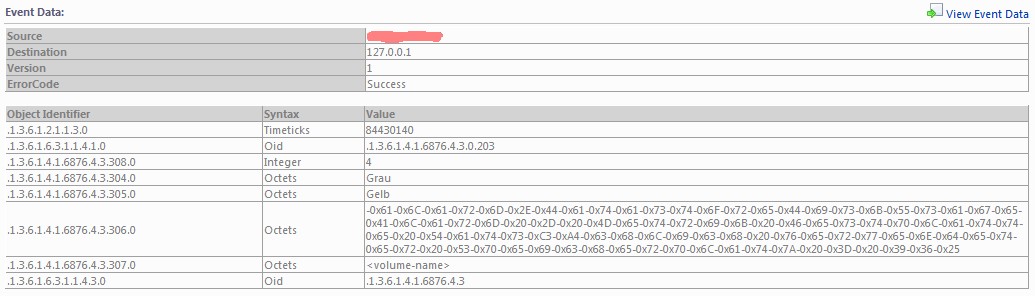
for writing the traps shell script. The script is just a kind of filter which throws away unwanted information. It converts the ASCII string of the
vmwVpxdTargetObjType to integer again (the MIB files provide information about the needed data type) and at least it coverts the german
umlauts (some guys say "funny or dotted characters") to the valid ASCII range. If you don't do that SCOM interpretes this as the
binary representation of octet string as you can see in the following picture:
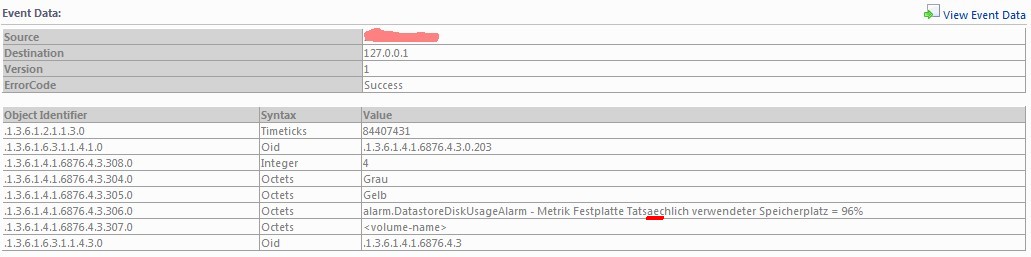
Just by replacing the umlaut ä to "ae" the octet string get readable again:
Now my dear reader is it up to you to build a free piece of software which displays the vCenter SNMP traps in a meaningful way into SCOM 2012.
I've provided you with all information and tips I've currently discovered.
You can download this page as pdf file [2000 kB].

![frank [dot] ickstadt [at] removethis gmail [dot] com](../bilder/email_kl.gif)